WMI Filtering (Targeting Specific Operating Systems)
So I have been using Group Policy for several years now and I figured I would start Blogging about things I think would be helpful to others.
I am currently migrating a group from Server 2000 infrastructure to a brand new 2008 R2 domain. yes that a mouth full but in the article I am going to focus on the Migration from Script Logic to Group Policy & GPMC.
Obviously there’s the resistance you have to deal with & and educating the staff on troubleshooting and implementation and standardization. Once all that’s done its GPO as usual.
So as a part of the migration SL (ScriptLogic) was targeting specific computers i.e. name, make, model etc.
So You can do the same with Group Policy and WMI. Using WMI can make your Group Policies much more flexible and powerful.
Objective:
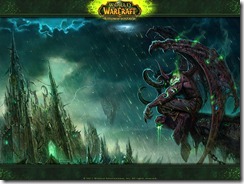
- Change the background of Windows ThinPC to Warcraft Image
- Change the background of Windows 7 PC to Disney Cars
In case you want to follow the Demo you will need the following:
- 2008 DC
- Windows ThinPC
- Windows 7 PC
So 1st lets get the 2 images we are going to use
Yeap disney “Cars” and “World of Warcraft” Yes I am fans of both ![]()
So now that we have what were going to work with lets get going.
Ok so lets go to: http://www.microsoft.com/download/en/details.aspx?id=12028 and download Scriptomatic
copy scriptomatic to both the Windows 7 PC and the Windows ThinPc
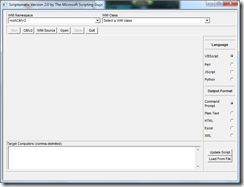
once you open scriptomatic it looks like the screenshot below:
So you can leave Namespace exactly as it is… (truth be told you, you should not have to change this at all)
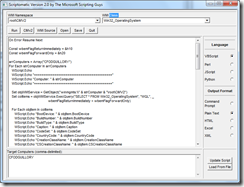
WMI Class on the other hand, theirs a ton of stuff in there and well, just about everything about any workstation can be found from here. So lets just select Win32_OperatingSystem Just like the screenshot below.
Notice that I have “Plan Text” set so I can see the results of the wmi query in notepad
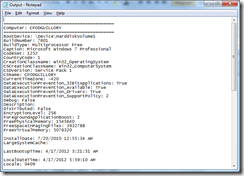
After running the query the screenshot blow shows you the output:
this is all we need at the moment to move forward setting up group policy to filter on WMI
so now time to work in group policy…
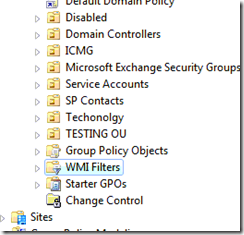
We go out to our Domain Controller and Open Group Policy Management Console and select WMI Filters:
The right hand side content area should be blank…
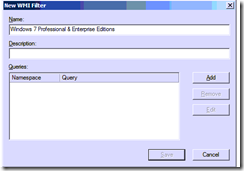
Right click in the area and and select new… from the popup window
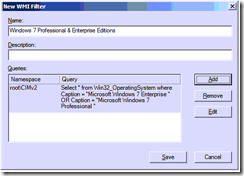
You will get the screen below…
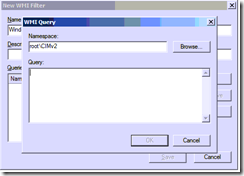
From there click add and you will get the following screen…
Leave the namespace at the root\CIMv2
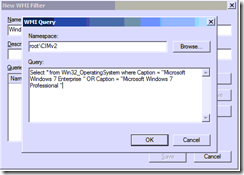
If you r familiar with SQL then this should be really straight forward for ya…
– Your basically running WMI query but the format is just like a SQL query
“Select * from Win32_OperatingSystem where Caption = “Microsoft Windows 7 Enterprise ” OR Caption = “Microsoft Windows 7 Professional “”
Click Ok
Click Save
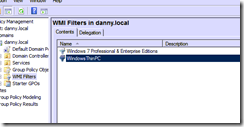
You screen should look like this:
Now we go through the same steps but add the query below for ThinPC
Select * from Win32_OperatingSystem where Caption = “Microsoft Windows Embedded Standard “
So now that we have 2 GPO’s built one to target Windows 7 Pro & Ent and another to target Windows ThinPC
So now lets go create our Group Policies to Set Wallpapers
So 1st lets get the file to the workstation
So well use GPP on each GPO to push the file to the workstation. (Computer Setting)
(as a personal decision I copy the file to the workstation, its perfectly ok for you to skip this step and use a network share)
So the path below is the path were the files are stored
The Path to the warcraft image is:
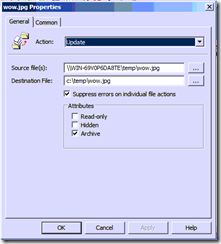
- \\WIN-69V0P6DA8TE\temp\wow.jpg
The path to the cars wallpaper is:
- \\WIN-69V0P6DA8TE\temp\cars.jpg
So using GPP and the settings below we will send the background image we want from the share location to the destinations below:
- c:\temp\wow.jpg
- c:\temp\cars.jpg
If you look at the image below you will see the settings I am using for File GPP to push the file to the workstations.
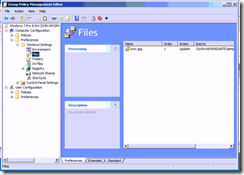
Once you add the settings above and hit ok, your screen will look like the one below:
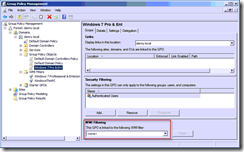
Then you should click on the GPO and at the very bottom you will see the WMI Filtering Section.
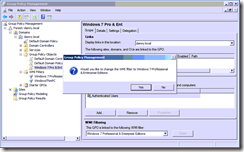
Click on the dropdown and Select the WMI filter we created earlier, in this case the “Windows 7 Professional & Enterprise”
You’ll get a popup that looks like the one below, just hit ok…
Your done. Repeat the same steps as above for the second GPO for ThinPC
Now GPO time again…
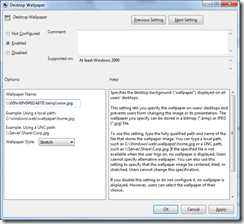
Open a group policy and go to:
- User Configuration\Administrative Templates\Desktop\Desktop\
Set the value as in the screenshot above.
Click ok…
Now the test go to a workstation that the GPO was applied to.
Open a CMD prompt, on the workstation and run GPUPDATE.
After this has ran you should be able to see the file in the “C:\Temp\”
Now if you setup your GPO correctly and applied it correctly to the container and you user. You should be able to see the Warcraft image displayed as the desktop background.
Repeat the same steps above for the Windows ThinPC image.
Twitter – @dguilloryjr
Email – dguilloryjr@msn.com


